Profurl rebuild and new forestay

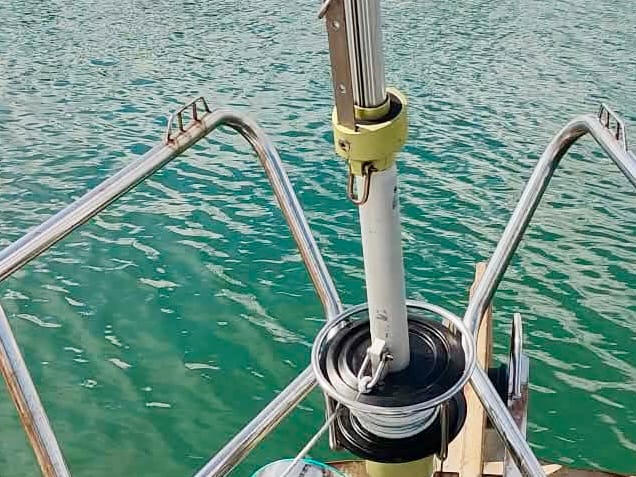
We have completed these projects and everything is in perfect condition now. Every bearing and seal was replaced and despite some marks of 30 year service, it feels and operates like new again.
By doing this ourselves, we now know every detail of the system, including how to shift the drum unit up for access to the turnbuckle (see picture below). For this you must first remove the lock screws that attach the foil extrusions to the lower unit. As the last screw comes out, we carefully lowered the foil extrusions onto the turnbuckle just below it. Next, very carefully remove the $35 a piece titanium screws that attach the lower unit to the short link plates. we attached the jib halyard to the tack attachment point of the lower drum unit and carefully lifted the unit about an inch, which exposed the pin underneath but still got the link plates engaged with their channels in the lower unit. Now we used diagonal wire ties to keep the link plates onto the pin and after that we could lift the lower drum unit up all the way as shown below.
Let me go through the parts in the picture below: at the top is the lower unit aluminum housing with the main bearing and seals inside. We replaced everything inside including the large circlip rings. Just below that is the Norseman fitting that attaches the forestay to the turnbuckle. For this we replaced the cone inside with one made by Tylaska (Norseman is out of business). Below that is the turnbuckle body, which is chromed bronze and I just cleaned and polished it. Below that is the ring stud which is new (Hayn) as the old one showed micro cracks which was the only threatening damage we found. Below that the pin and toggle that go to the chain plate. The two link plates on the pin are new as well as one showed cracks. The pin itself and the toggle were totally fine.
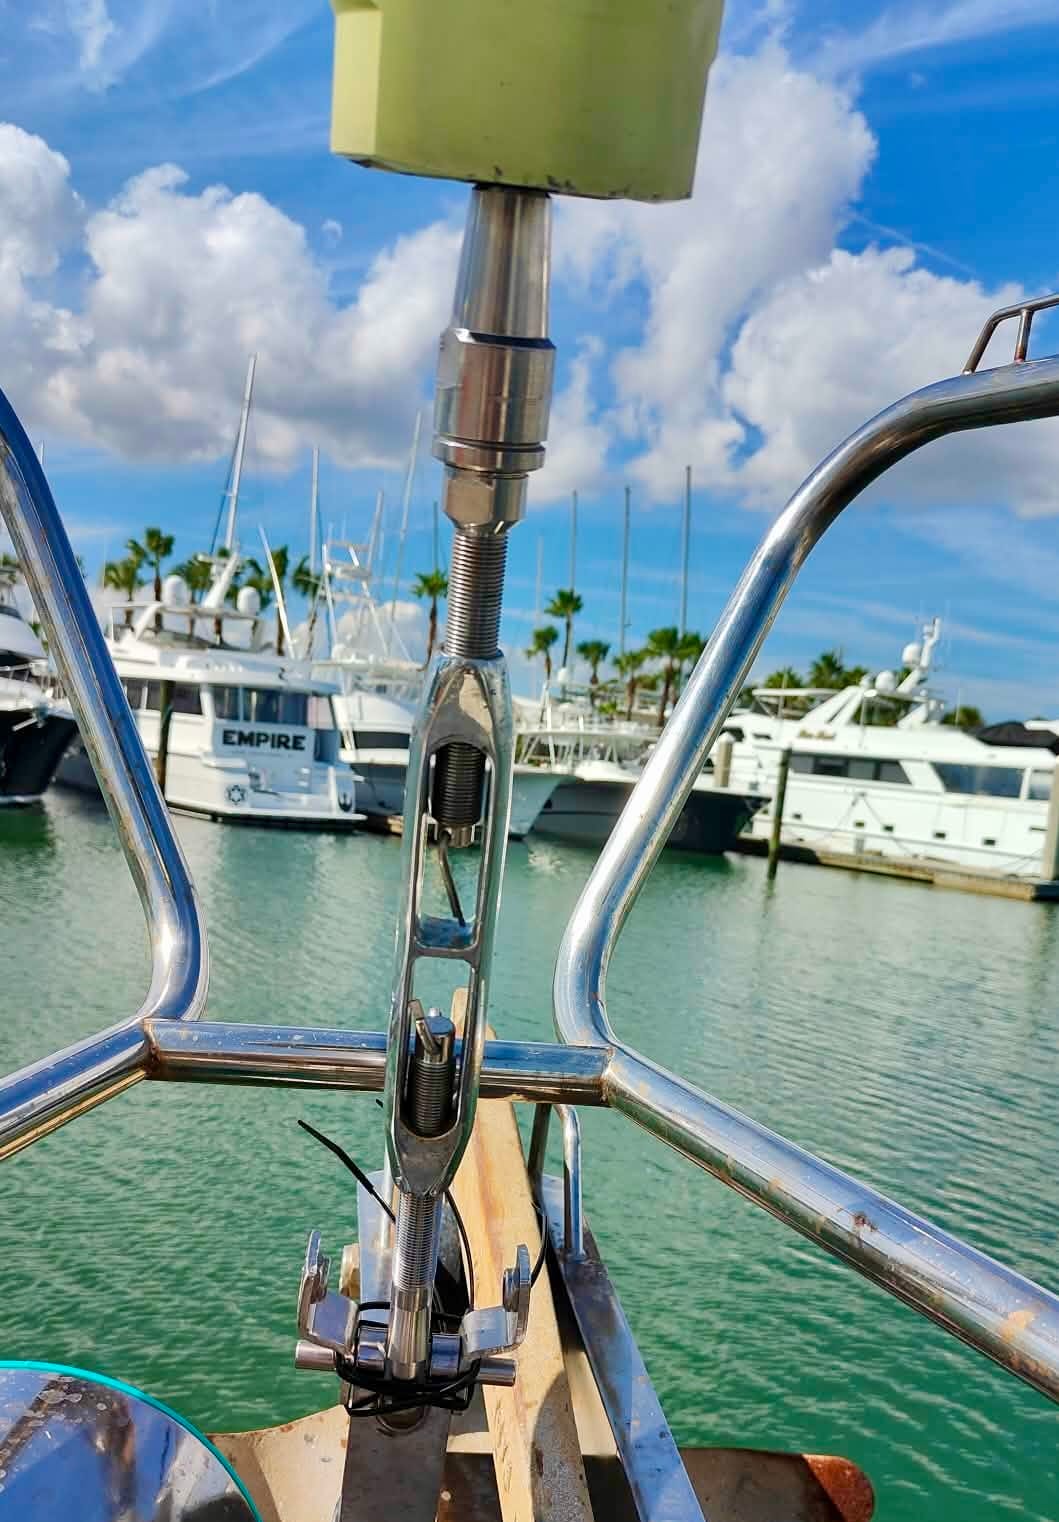
Putting things back in reverse order was simple. Our forestay is 60’ long (18 meters) and I could easily lift the foil to get the screws in. It’s a 2-person job of course.
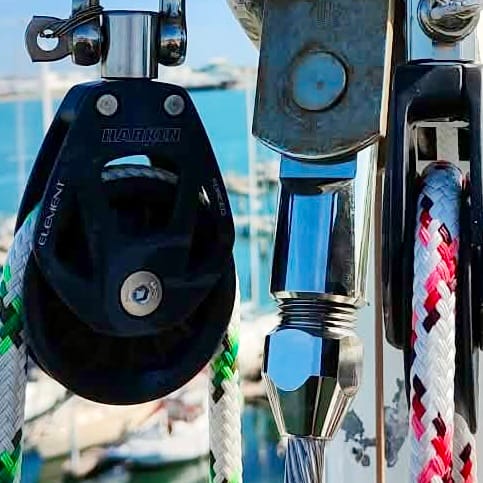
At the top we installed a new Sta-Lok eye terminal after sliding and fastening all the foil extrusions back on. The couplers between the extrusions have bearing sleeves to keep the stay centered, which we replaced with 3D printed polycarbonate ones. Also, we upgraded from the regular set screws to dog-point set screws that have a pin at the end. For this we had to drill holes in the couplers at each set screws position. This was relatively easy and it is an upgrade to how the new Profurl extrusions do this.
Comparing the Sta-Lok terminal to the old Norseman: they both are made very well but I prefer the Norseman. I believe it’s made better and I can see how Sta-Lok could sell theirs well under the Norseman prices which probably was the reason Norseman was taken off the market. Forming the wire around the cone is much easier with the Norseman which is forged and/or machined for this where the Sta-Lok has a thin insert. With the Norseman the strands continue beyond the cone for 1.5 times the wire diameter whereas with the Sta-Lok it’s only 3mm. That said, with a couple big wrenches the Sta-Lok doesn’t have any problems and has proven to be stronger than the wire itself.
We filled both fittings with sealant and use thread locker on both as well. The most scary part was cutting the new wire to length. This is KOS wire from South Korea.
This leaves the upper swivel as shown in the picture at the start of this article, which was also rebuild with a new bearing and new seals and circlips. My estimate is that we saved about $4k over buying a new Profurl and I’m not sure it would have been better. The new parts were all in stock and delivered quickly. We bought the titanium bolts and link plates from Profurl and the bearings, seals, circlips and set screws from Amazon, eBay and McMaster-Carr.
Using a mechanical fitting at the top is also an improvement over a swage fitting: it allows up to 1/2” wire, easier installation of the foils and more space as it’s shorter than the swage fitting. Also, it can be installed using some basic hand tools. We did have large adjustable wrenches, one 18” and one 24” which makes it a breeze. The extra cost of the Sta-Lok fitting is compensated by doing the work ourselves, plus when we need to replace the stay the next time we can re-use the Sta-Lok fitting.